Tuesday, September 29, 2009

IT'S THAT FUN TIME OF YEAR


This cute Pumpkin is also from a Pumpkin Spice Espresso Goblin Kit and is available at the Attic Window Quilt Shop. If you click on the picture to enlarge it, you can see the other cute kits that are available. The kit comes in a coffee container like the one you get when you purchase coffee for take out. Check it out.


You will notice two new buttons on my sidebar. Let me tell you about them. Margaret’s Hope Chest has agreed to provide a quilt for each child in the Grand Rapids, Michigan Public School system who is homeless during the Christmas season. Margaret's Hope Chest is looking for your help. The Hope Squared pattern is easy. Just make a quilt out of squares. Any size, any number, any color. Use up some scraps. Dig out your kid-themed fabrics and pair them with some bright solids. Please consider that all ages of children will be receiving these quilts-boys and girls. Base the size of your quilt on the size of the child you have in your mind as you create it. Please check out her blog and consider donating to this worthy cause. You may drop your quilts off or mail them to Margaret's Hope Chest, 630 Griswold SE, Grand Rapids, MI 49507.

The other button is for the Blogger’s Quilt Festival. Whether you consider joining the fun and displaying a quilt or not, you will still want to click on the site and see all the beautiful quilts that will be on display. Seeing other’s creations is worth the visit and the amount of inspiration you will receive. Click on the button on the sidebar for further details. The Festival is being held from Oct. 9 – 16th. During that time the button will lead you to how you can sign up to display your quilts. If you have any questions, go to that site to see Amy’s updates.

Designing Happy has a great tutorial for making Halloween Treat Bags.

Until next time - Happy Quilting
Caroll

Sunday, September 27, 2009

FIVE WAYS TO PROTECT YOUR ASSETS (STASH)


Protecting what matters to you most: your family, home, car, your STASH
.
What happens if there is a fire, flood, or you are away on vacation and someone breaks into your house and steals all your assets? Okay so not many thieves are going to steal your stash, but I bet if they think about it for a minute or two as they scan your sewing room and open a few closet doors, they will become aware of just how much money you have invested in your hobby and how valuable these things are. The big question is, do you know how valuable your quilts, stash, and supplies are? Quilters are alike: buy when and what they can, add to their stash, and over the years have accumulated quite a number of $$$ in fabric and supplies. Some of you may even have vintage quilts or irreplaceable fabric you have picked up at estate sales or antique shops. Here is the ultimate question you should ask yourself: HOW MUCH IS MY STASH WORTH? Can I get insurance? Is there a rider?
.
After checking with my insurance company, I learned that all such items are covered under “contents subject to deductible.” WHAT? I don’t even know what my deductible is. Furthermore, I would not begin to know how to make a claim. How could I prove or even estimate how much money is involved. What would the insurance company say when I told them that the fabric I purchased 10 years ago for $5 a yard was now worth $10 a yard? One insurance agent (not my own) in a rather snooty tone told me that “there is such a thing as depreciation, you know.” I wanted to tell him that fabric does not depreciate! Later, when I talked to my regular insurance agent I was told that there are five things quilters should do:
  1. Keep Good Records
    When you start a quilt, document everything. Keep receipts of how much money you spend on fabric, pattern, batting, thread, and other supplies. Also record your time spent making the quilt. When the quilt is finished, take a picture of it and put it with the receipts. Document what awards this quilt receives. Keep this information together in a safe place.
  2. List Your Supplies (below is just a sample and is by no means conclusive)
    Spray starch
    Sewing machines (I know one woman who has nine machines and says she uses them all depending on what project she is working on.)
    Rotary cuter
    Needles
    Iron (I have several)
    Cutting mats
    Quilt batting
    Pins
    Threads
    Design wall
    Rotary cutters
    Rulers
    Books
    Patterns
    Magazines
  3. Take Pictures
    You have probably finished many quilts over the years. They decorate your home or are stored in your closets. Even if you do not have the receipts, you can still take a picture of them and put it in your records file. It’s proof that you had the quilts.
  4. Get An Appraisal
    Have you ever thought about what would happen if that beautiful quilt you loaned to the quilt shop, or have on display at the bank, or in a quilt show, was stolen or ruined in someway? How would you make a claim? Get an appraisal in writing and keep that with your other documentation. The Lost Quilt web page suggests that you have your quilt appraised every three years.
  5. Get Your Finished Quilt Insured
    We all tend to undervalue our own work. Quilts are valuable and you can have them insured. Get it in writing from your insurance agent that your quilt and the appraised value is on record should anything happen. Make sure you understand if the insurance covers the full value or the replacement value. Is it covered only while it is in your home, or if you have it on display elsewhere is it covered while there also? On the Lost Quilt web page you can find links to an insurance agent who offers a comprehensive policy that will insure your quilts, quilt making supplies, sewing machines, etc.

    It sounds like a lot of work. I’d rather spend my time quilting than making a paper trail. If something happened, I could just go out and buy more fabric and that is half my fun in life. However, there are a couple of things to think about. It has taken me years to find these unique fabrics. Most important, who is going to pay for it? Not only have I accumulated a substantial amount of fabric, but what about my supplies and my machines. Sewing machines run into the thousands of dollars! So on second thought, maybe it is important to keep those records….just in case.

♥On a more positive note, Elins Kreative Side has the cutest free Redwork patterns. Check it out.

Until Next Time, Happy Quilting,
Caroll

Friday, September 25, 2009

WHEN STRESSED DO APPLIQUE

Wow! What a week. There were so many new things to learn and do. It was fun, but a bit exhausting. Consequently, I needed something relaxing to do, something to keep my hands busy, something to help me unwind. Therefore, I picked up a block from Aunt Millie’s Garden and settled on the couch in front of a good movie on TV. Above is the first block that I finished in this 12-block quilt. Some might call it a bit predictable, but I have kept the mystery in picking the fabrics. I have decided to do this quilt in Brights and have had scads of fun browsing my stash searching for just the right color. I was amazed that I found so many fabrics that I had forgotten all about. I collect FQs and there is plenty of material in one FQ to make a block, especially since I am trying to use many different fabrics in each flower. I am now working on my sixth block (not all of them done this week!) and will be showing the others to you as the weeks move along.

Hugs From Helen has the cutest design for a charming bed pocket. What a great way to keep your bedroom organized. I was thinking of making several as Christmas gifts. I like that it is unusual and not something you would see in the department store.

Have a great weekend,

Caroll

Wednesday, September 23, 2009

BE AN UNPREDICTABLE QUILTER

This is another sample on display at the two-day workshop held this week by the West Michigan Quilter’s Guild. Teacher/author/quilter Mary Lou Weidman has introduced us to a new way of making these awe-inspiring quilts. She encouraged us to move out of our box and not be predictable. Mary Lou’s quilts are anything but predictable. That’s what keeps the mystery in her quilting.

These blocks above are Mary Lou’s samples for the Flower Power workshop. Her flowers, birds, and insects are powerful and unique. They are also a challenge to the more traditional quilter who is not so comfortable moving out of her box. A lot of grumbling and giggling could be heard throughout the day. With Mary Lou’s encouragement, we plodded on and actually came up with some nice blocks.

Above are some of the blocks we students made during the two-day workshop. We have a long way to go before we achieve Mary Lou’s creative beauty, but she got us started and on our way. Mary Lou says that the scrappier a quilt is the better because it makes a quilt interesting and less predictable. She is an excellent teacher, and kept us sewing and cutting steadily throughout the two days. We certainly got our money’s worth with Mary Lou teaching us and urging us to tap into our inner creativity.

This is a close up of one of the wall hangings made during the day. Didn’t this student do an excellent job! She said she is going to put a green border around it. Check out Mary Lou’s blog for more creative ideas. The link is on my sidebar.
Until next time, Happy Quilting! And be unpredictable!!!
Caroll

Monday, September 21, 2009

ONE REASON TO BREAK OUT OF YOUR BOX

Cluck Cluck! I fell in love with this quilt that Mary Lou Weidman brought to her Hoochy Mama workshop today sponsored by the West Michigan Quilter’s Guild. Mary Lou is so clever and it is such an inspiring workshop (this was day one of the two-day workshop). She had us so engrossed in what we were doing that my fingers never once moved toward the package of cookies in my lunch box and I never even thought of chocolate. That’s really saying something because that certainly never happens when I’m quilting at home. Mary Lou said that if you always do what you’ve always done, you will always get what you’ve always got. You’ll never catch her doing the same old thing and these unique quilts prove that.


The above quilt is another by Mary Lou Weidman. At the top is says, "I feel like a witch if I can't find time to stitch." Isn’t it wonderful! Check out her Power Flowers in the border.
Do you have any UFOs? I have so many that I quit counting. Now I know why. Mary Lou said that one reason we have UFOs is that we lose the mystery. We go to the store, purchase fabrics that we love, get a new pattern, come home and make about six blocks. There may have 20 or 30 blocks to go, but we put the project aside and go to the quilt store, buy new fabrics, get a new pattern and start a new project. Why is that? She said we put aside projects because after making six or so blocks the mystery is gone. We start a new project because we like the mystery. If we are making traditional blocks the mystery is soon gone and the cycle starts all over again. With Mary Lou’s non-traditional way of making a block, there is always mystery. We never know what a block will look like. No two blocks are ever the same. There is mystery in every block. There is mystery in what the finished quilt will look like. I bet I’ll never put one of these "out of the box" quilts in my UFO pile.

The above picture is of the blocks that the class made today. Aren’t they wonderful! Can’t you just see them in a quilt? I can’t wait for tomorrow’s class. It’s the Flower Power class and I bet we’ll make some great flowers. I’ll try to post pictures tomorrow.
You can check out Mary Lou’s blog and see the many samples of her unique quilts. There is a link on my sidebar.
Until tomorrow,
Caroll


Sunday, September 20, 2009

AROUND THE WORLD QUILTING BEE

Today is all about the Around The World Quilting Bee. Above is a block that I just sent on its way around the world. I can’t say who it belongs to because you know I’m getting older and my mind is escaping me and I can’t remember who said they did not want to know or see pictures of their quilt. I just hope she likes it.

This is also another block for ATWQB, which I will send on its way tomorrow. I’ve had so much fun working with this group. It’s really been interesting to watch the quilts grow and to see the different blocks that are being contributed. I love applique and used the same method on these blocks as I did in my tutorial here.

Within A Quarter Inch had a great idea the other day. She said that she could never remember when she last changed the blade on her rotary cutter, so she now writes the date she changed it in permanent marker on the blade so she wouldn’t forget. What a great idea!
Allison at Cluck Cluck Sew has a great tutorial for a double hourglass block. Check it out.
I’m on my way Monday and Tuesday to take classes from Mary Lou Weidman. The first class is Hoochie Mama. The second day is the Flower Power class. These look like they will be such fun classes. I’ll post pictures next week.
Until then, have a great week,
Caroll

Friday, September 18, 2009

THREE REASONS TO SHOP

Above are just three reasons to shop at the Attic Window Quilt Shop. Winter is coming here in our part of the world. No matter what we may think about the coming days ahead, we can’t keep them at bay, so why not concentrate on the positives. What better way to do that than to shop and stock up for those house-bound days! You will enjoy making this wall hanging (maybe I should say making all three). Imagine them hanging in your home during the holidays. What a comfort to friends and family when they see these cute snowmen announcing the fun time of year. You can get the pattern and fabrics at the Shop.

Here is another sample of a winter project. This is called Over The River & Through The Woods and you will find the pattern and fabrics at the Attic Window Quilt Shop.

Above is a nice wool pillow. There is no time like the present to start work on this delightful holiday gift. Patterns and wool are at the shop.
Oh So Happy Together has a tutorial for making rag quilt letters. “What?” You wonder. “Why would I want to make rag letters? What do you do with them? Who wants rag letters hanging on their wall?” You have to go see how adorable these letters are. And they are not for the wall, but for that preschooler in your life. These letters are a great way to help them learn their alphabet. What a nice gift they will make.
Have a nice weekend,
Caroll

Wednesday, September 16, 2009

DRAWSTRING BAG MAKES NICE GIFT

Check out the above drawstring Bag made with Christmas Holiday fabrics. LeeAnn made this sample for the Attic Window Quilt Shop. She said it is easy and quick to make and will make a great gift bag for a special friend. The pattern and the fabrics are at the shop. Better get there before the Shop Hoppers see it and snatch up all those beautiful fabrics. The Harvest Shop Hop begins Saturday and runs all next week.

Above is a sample for Sue’s Total Towel Makeover class. You can make your own decorative towels by using homespun fabrics to add decorative appliqué. She uses the easy Wonder Under method to make these delightful towels. Sue’s class is next Tuesday. Sept. 29 from 6-8.

Quilt Dad has a wonky log cabin tutorial that is attention-grabbing. Scroll down to find it. (I love it when a man quilts, don't you!) You'll like what he does. Check it out.
Until next time,
Caroll


Monday, September 14, 2009

CATS AND THINGS

Don’t you just love this Cat? It is from a Pumpkin Spice Espresso Goblin Kit and is available at the Attic Window Quilt Shop. Be sure to stop in and take a look. The kit comes in a coffee container like the one you get when you purchase coffee for take out. Really cute.

Remember when the gals were making the cat quilt? Julie didn’t make the entire quilt. She said she thought her block looked so much like her cat that she made it into a pillow for her. This is a picture of Pooch enjoying her hand-made gift. They do look alike, don’t they? Great job Julie!

This quilt is Blooming Rectangles, a sample that Colleen made for the shop. The Attic Window has kits available. The pattern is in a book, which is also available at the shop. Looks like a fun project.
Bitty Bits and Pieces has a great tutorial for a itty bitty ditty bag. Stop over and take a look.
Happy Quilting,
Caroll

Saturday, September 12, 2009

CLASS SAMPLES


Make this seasonal tumbler quilt to dress your table during the autumn season. You can make this Quilted Quickie Table Runner using charm packs and add a seasonal appliqué. Join Sue at the Attic Window Quilt Shop this Wednesday, Sept. 16, from 6-8 p.m. and make one or several. It would make a pleasing hostess gift too!


At a recent Bee Gerry (left) shared her finished Vintage Valentine Quilt. It is stunning! The colors she chose really made those valentines pop. She does outstanding appliqué too! Great job!


Jeri (left) also shared her most recent finish at the Saturday Bee. This Quick Trip Around the World quilt has vibrant colors and is sure to please the person who receives this exquisite gift! I love the size too! What a great job you did on this large quilt!

Has everyone signed up for the Harvest Shop Hop. It starts Saturday, Sept. 19th (no shops open on Sunday) and runs through Sept 21 – 26. There are 10 participating shops and costs only $10 to participate. The money secures your space and you will receive a passport and pin. You will receive a free pattern and free gift at each store you visit. Those visiting all shops will be eligible for the Grand Drawing prizes, which include a Bernina Activa 220 with a slide on table, an Oliso Iron, a Rotating Carrier, a pair of Spring Action Gingher Scissors, a $25.00 gift certificate from each shop and 10 gift baskets with donations from many of our vendors including Sakura of America. You can sign up at any of the participating shops.

Be sure and stop in at the Attic Window Quilt Shop this week and see all the changes that have been made. Chris and her staff have rearranged the store giving it a roomier feel (and more room for fabrics!). You’re sure to like it.

Paloma over at Three Kitchen Fairies has a comprehensible tutorial for an easy way to make a wagon wheel quilt block. Check it out.
Happy Quilting,
Caroll

Thursday, September 10, 2009

AUTUMN SAMPLE AND BEE PIX

We’re back in business. Before I tell you about the computer virus and what you can do to keep your computer safe, I want to share some photos with you. I went to Bee last Saturday and took many pictures. Above is a sample that Colleen made for the Attic Window Quilt Shop. Wouldn’t you love to have that table runner in your home? The pattern (it’s in a book) and the lovely woolens may be found at the shop. Stop by and take a look.

Jennifer Lewis (left) and Jeanne Bird (right), mother and daughter, took last year’s sampler BOM classes. Note how different their quilts turned out. I love the creativity involved in making each quilt uniquely her own.
Now for my experience. I want to tell you in detail what happened to me in the hopes that it will not happen to you. I was on Google Search looking for a tree skirt pattern. I want to say up front that in no way do I think Google was responsible for what happened to me. I clicked on a site (wish I could remember what it was) and once in, I got a pop up. A little square box appeared in the middle of the screen. I think it even had “Explorer” at the top, which made me think it was legitimate. A message said that my antivirus program had detected three Trojans that could ruin my computer. It asked did I want to get rid of them. Well, yeah! Therefore, I clicked “yes.” Then it started downloading “My Personal Antivirus.” My brain finally kicked into gear and I thought, I don’t have that, I have McAfee and it just ran a scan on my computer four hours ago. I tried to get out of the program but I could not so I shut the computer off and called my IT guy. He told me that when that pop up first came up I should have just gotten out of the program by hitting control, alt, delete, or just Xed out of the internet browser. So be sure and do that if that ever happens to you. Do not do what I did and say “yes.” After you X out of the internet, you can always rerun your virus scan to see how legitimate the message was. You probably will not find a virus. Eddie, my IT guy, says they are fishing (I think that’s spelled phishing) and trying to get you to buy something or trying to get your personal information. I was fortunate that Eddie was able to remove everything harmful with no problem. I understand Nanette over at Freda’s Hive had a bigger problem and had to reinstall everything. Keep checking her blog (see sidebar) to see what she has to tell us about her problem and how to avoid it.
Primrose Design has a groovy 1960s kitty pattern. Her Stitch School also shows you how to make the various stitches. Check it out.
I hope everyone is having a great week! Until next time, happy quilting,
Caroll

Wednesday, September 9, 2009

THIS IS CRIMINAL....

I agree with Nanette over at Freda's Hive, this is criminal. I too got a nasty virus and still do not have my computer back from the repair shop. At first I was very angry, and I do agree with Nanette when whe said, "It is absolutely a criminal act to maliciously try to infect someone's computer..." (Nanette I hope you don't mind me quoting you.). Why are some people so malicious? Why do they try to disrupt your life, steal your passwords, and try to get into your bank account, etc. After I calmed down I told myself that I can only feel sorry for these poor pathetic people who lead such pathetic lives that they have nothing better to do than to try make others miserable. So I decided not to give them the satisfaction. I am not miserable. I'm just thanking God every day that I'm not one of them. So, no pictures today, but I'll post something soon. Went to Bee Saturday and got lots of new things to share with you.

Until next time: Happy Quilting,
Caroll

Tuesday, September 1, 2009

HALLOWEEN TUTORIAL

I prefer the turned under edge for appliqué and that was why I will be showing you how to do the Freezer Paper method in this tutorial. However, any method of applique may be used for this project. I find it helpful to have all the layers of fabric glued in place before I start to sew. This method makes for a great take-with-you project. I hope you like my way to appliqué.


You will need to go HERE to download the four-page pattern. Note the registration marks (X) and match them up when putting the pattern together.  It is my understanding that these links no longer work.  Until I am able to figure out how to get them to work, please send me an email and I will send them to you.  
You will need to go HERE to download the instructions for appliquéing with freezer paper. This will be helpful when looking at the following pictures and trying to follow my directions.


After you have downloaded the design and taped the two pieces together set it aside as this will be used for placement reference. Then copy the various parts of the pattern onto freezer paper (FP). Please refer to the FP directions that you downloaded for complete instructions on how this should be done. You should make a template for the skirt, the legs, the shoes, and the buckle. There is no need to make a template for the spider as that will be done in a different way.


Sandwich your drawn template (or do as I did and place your drawn template on top) between two pieces of FP and iron together (refer to FP directions that you have downloaded). Some people use only one piece of FP and I admire the way they can do that. I never can. I have a heavy hand and tend to splash the wet starch onto the FP and it wrinkles and distorts the design. A thick, cardboard like template made of three pieces of FP keeps the starch from soaking into the FP and distorting the template. It’s easier to handle and also much easier to pull the fabric around the stiff thick template. This kind of template can also be reused over and over.


Once this thicker template has cooled, cut the pattern from the freezer paper, being careful to make a smooth cut, leaving no bumps as they will show up later in your fabric.


The following directions are for the baggy socks only. This picture is to show you that the fabric for the legs needs to be longer than the template to allow extra material for scrunching.


In this picture I am showing you how to make the baggy socks. This step need only be taken for the baggy socks. Follow the FP directions for the other pieces of the pattern. For the socks, place the template down on the ironing board, waxy side up, then scrunch the fabric over the template, (right side of the fabric facing up) and iron the wrinkles in place.


Iron in the wrinkles. They will adhere to the FP. This is what is so great. There is no right or wrong way to iron wrinkles. Be creative and do what you like.


This is what it will look like from the other side. I apologize that the template looks so scorched and dirty. I thought about making new ones, but wanted you to see how sturdy these templates are. I have made 15 witch’s shoes blocks with this same template, so it really was well used and worth the effort in the beginning when making the templates.


Once that has cooled, cut your fabric, leaving a scant ¼ inch of fabric beyond the template.


Now brush starch onto the fabric extending from the template. You can refer to the FP directions you have downloaded for more information. You will note in the picture that I use canned spray starch. I just spray a small amount of starch into a small jar and then use that to dip in my brush. I have used other forms of starch but nothing seems to work as well for me as does spray starch.


Gently pulling the starched fabric around the template, press with an iron. The iron should be hot enough so that you hear a sizzle when placing the iron on the wet fabric. Sometimes a stylist will help you grab the fabric and keep your fingers away from the hot iron. Apply pressure to the iron, and leave the iron on the fabric long enough so that the fabric dries. I have found that a heavier iron works best. A small Clover iron does not work for me.


Turn the template and fabric over and gentle tap with the iron.


Once that is cool, carefully remove the fabric from the template.


Iron the fabric again, tapping lightly to make sure everything stays in place.


Turn and tap lightly with the iron again. Now place this aside and go to the next template. Make the other leg, then go on to the shoes.


For the shoes and the other templates lay your fabric wrong side up on the ironing board. Then place your template waxy side down on the fabric and iron. Once cooled cut a scant 1/4 inch from the template. The shoes are a little tricky because of the inner curves and the pointed toe.


Carefully clip the inner curves all around the shoe.


Brush with starch.


After you have brushed the starch onto your fabric, carefully fold the fabric down at the point (no need to iron yet).


Now fold in one side (do not iron yet).


Then carefully fold over the other edge and iron everything in place.


Your point should look something like this.


Now we deal with those curves. The curves have already been clipped and starch applied. Now you can iron.


Sometimes you can let your iron do the walking, and by pushing the nose of the iron beneath your fabric it will coax the fabric back and in place.


Complete the process around the shoe, turn over and press. Once cooled, you may remove the template.


You can make the skirt the same as we have demonstrated above.


The buckle is easier than it looks. Place the buckle template on the fabric and iron as you did the other templates. Once cooled, cut the fabric a scant ¼ inch from the template. Cut a small circle around the inner opening of the buckle. Clip around the curves. Brush with starch and iron, first turning the outer edges inward, then turning the inner edges toward the outside. Cool and remove template.


Once you have all your pieces ready, place them onto your background fabric. I used a 13 inch square of fabric for the background and cut down to 12 ½ inch after the applique and all embroidery was finished. Pin the pieces in place.


Once you are certain that you have every piece where you want it, apply small dots of basting glue (Roxanne’s glue, Basting glue, or Elmer’s glue) to the inner edge of the turned under fabric. Stay away from that outer edge as that will be where you will sew. I allow a few minutes to dry and then remove the pins. Thread gets tangled around pins. Now you are ready to stitch everything in place. This can be done by hand or machine.


Now for the spiders. Use Wonder Under or Heat-N-Bond to cut small spider bodies, then iron in place onto your background fabric.


Use a marker to mark the spider web and to mark the spider legs. With two strands of floss, embroider the spider web and legs.


Wa La….The final product. I hope you enjoy making your Halloween block as much as I did.


Happy Quilting, Caroll
lkjlkj

Attic Window Teachers

Attic Window Teachers

Quilting for Kids With Cancer

Quilting for Kids With Cancer
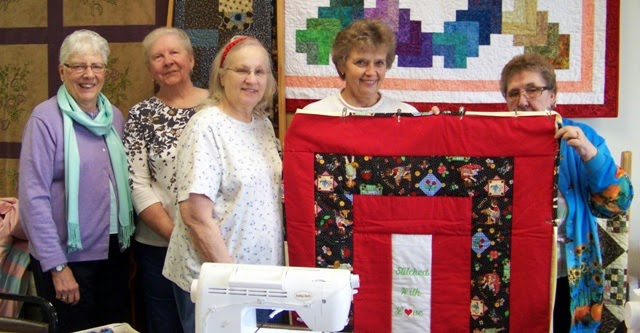
Generosity has no bounds. Above are the women in the Quilts For Kids group at the Attic Window Quilt Shop. Left to right, Henrietta, Phyllis, Nancy, Carol, Karen. These women donate their time, fabric, money once a month to make quilts for kids who have cancer.

Quilts For Wheels

Quilts For Wheels
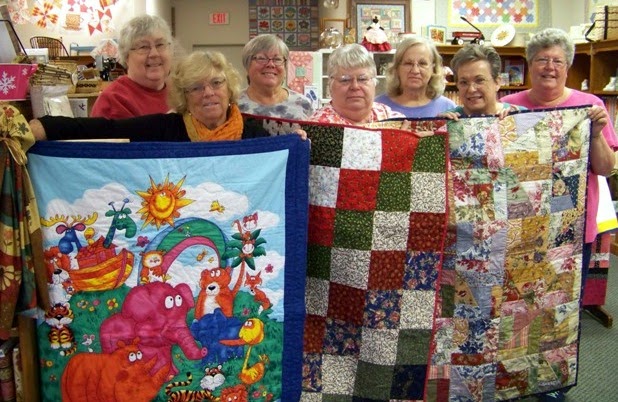
Many thanks and much appreciation goes to the women who work diligently each month to make quilts for those in wheel chairs. Kudos go to: Yvonne, Mary T., Fran, Joan, Mary Ellen, Barb, Lee Ann, Nancy, Mary.
Quilting Bloggers Logo